Do you have a false indigo that you would like to move or divide? Maybe it’s too large for its allotted space, or it’s not flowering well. While there are definitely easier plants to divide and move, False Indigo (Baptisia) can be successfully transplanted if you:
- Plan ahead
- Take your time
- Have a strong spade and back
When is the best time to move or divide false indigo?
MOVE - As long as you dig the plant up with a good root ball, there is no wrong time to move a healthy Baptisia plant. Baptisia actively grow roots and recover quickly when the soil has warmed up in late spring. If given the choice, I prefer to move them just after they finish flowering.
DIVIDE –Early spring or just after flowering so plants have the rest of the growing season to recover.
How to move or divide false indigo
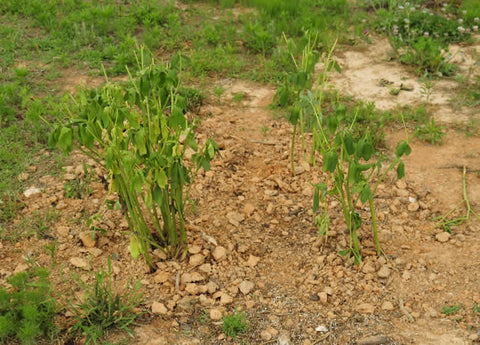
1. Before you start, cut the plant back by half
No matter how many roots you save, the tender new growth is going to wilt, turn black and die. Cutting it back also makes digging around the base easier.
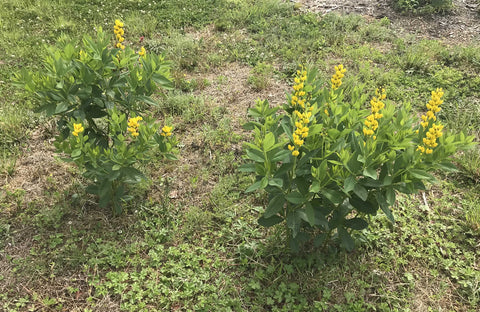
2. Select a siteChoose a site that gets at least six hours of direct sun and you’ll be rewarded will abundant flowers and a compact plant that shouldn’t need staking. Baptisia thrives in most well-drained soils and can tolerate drought and periodic flooding.
3. Prepare the new spotYou want to be prepared and have the new site ready, in case you’re too tired to do so once you have the plant out of the ground – just kidding. Remember to dig wide, not deep when planting.
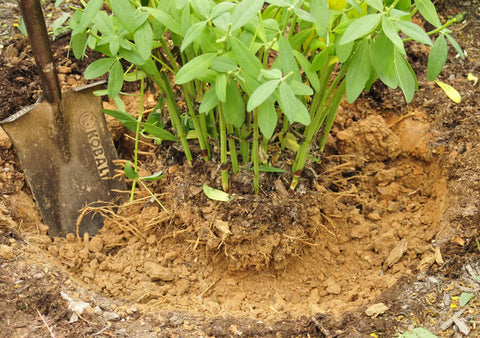
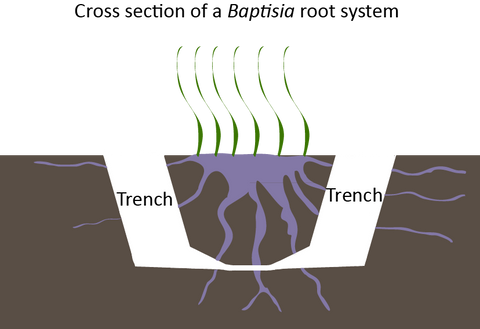
4. Dig a trench around the perimeter of the plantThis gives you room to work and lets you evaluate your progress. Start the trench about 3 to 6 inches out from the outermost stems. You’re going to cut through some thick fleshy roots. That’s okay – as long as you dig 3 to 6 inches away from the stems the plant will have enough roots to survive.
After digging down to a depth of 8 to 12 inches, undercut the root ball. If it’s been in the ground for more than a couple of years you may come across several large roots. These can be cut with a spade or pruners. If it’s a large plant you may need to rock it back and forth to locate the roots and use a saw or ax to cut through the roots.
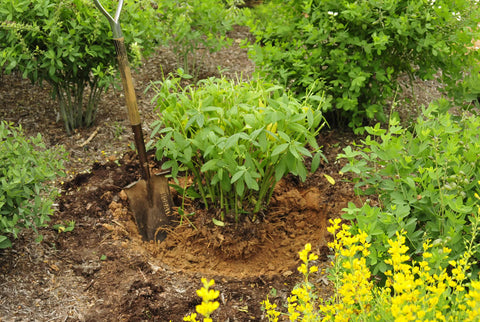
Knock excess soil off the root ball – this will make it easier and lighter to lift out of the ground. An extra pair of hands helps when moving a large plant, but it’s surprising how much can be achieved using planks of wood as levers to lift the rootball out of the hole.
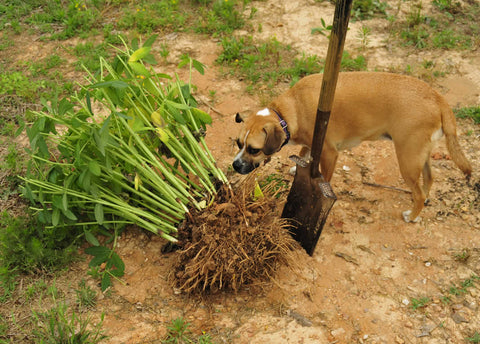
While it’s not necessary for the health of the plant, it is possible to divide false indigo. Dividing them will give you extra plants, but it will take the plants longer to recover from the shock of being separated. Once your plant is out of the hole, knock most of the soil off to expose the thick, woody crown. Use an ax or old saw to split or cut through the thick crown; making sure each division is at least six inches in diameter.

Before lowering it into its new home, check to see that the hole is deep enough – you don’t want to lift it out once it’s in. Neatly trim off the ends of any damaged roots with pruners.
9. Replant and waterRefill with soil and water in well. There is no need to add amendments or fertilizer to the soil. Baptisia are able to absorb nitrogen from the atmosphere with the help of root colonizing bacteria. This allows them to tolerate less than perfect soil.
If transplanted in spring or early summer, you should see new shoot growth within a week. After a week, scratch down into the soil to check if it’s still moist. If it is, wait until it dries out a little before adding more water.
If the new growth starts to wilt, dig down to see if the soil is wet or dry. If it’s dry, go ahead and water. If the soil is moist or wet, hold back on the water – wilting can be a sign the soil is too wet.
Frequently asked questions
Why do we recommend moving false indigo in the spring instead of the fall?
Baptisia loves the heat and recovers quickly when transplanted in the spring, once the soil has warmed up. They can be moved in the fall, but they will not produce many new roots at that time of year and there is more of a risk of it rotting over the winter.
Can I move a weak or unhealthy false indigo plant?When moving a Baptisia that’s not thriving, timing is important. It’s likely that the root system is weak and transplanting it in the fall or winter may result in it just sitting there and rotting. Follow the steps above and remove the soil to evaluate the roots. Trim any rotten roots off and replant in a sunny spot with well-drained soil and let the plant dry out a little between watering.
How long can I wait between digging up and replanting?If you’re transplanting during the growing season, try and complete the job as soon as possible. If something pops up, a couple of day's delay is not going to hurt. To keep the plant in peak condition, store it out of the direct sun, mist with water, and wrap the root ball with plastic or a tarp to prevent the roots from drying out.
Can a false indigo plant be too large to move?No, it just requires time and patience. I have transplanted several dozen Baptisia of all sizes and different times of the year and each one survived and thrived in its new home.
Now you can move that Baptisia to its new home with confidence!